To change default system font on Windows 11, you have to make changes using the Windows registry settings. It cannot be changed from the Windows 11 settings. I have explained the detailed steps ahead in this guide. In brief, you have to create a registry file that contains some code fragments to change default system font on Windows 11.
Steps to Change Default System Font on Windows 11
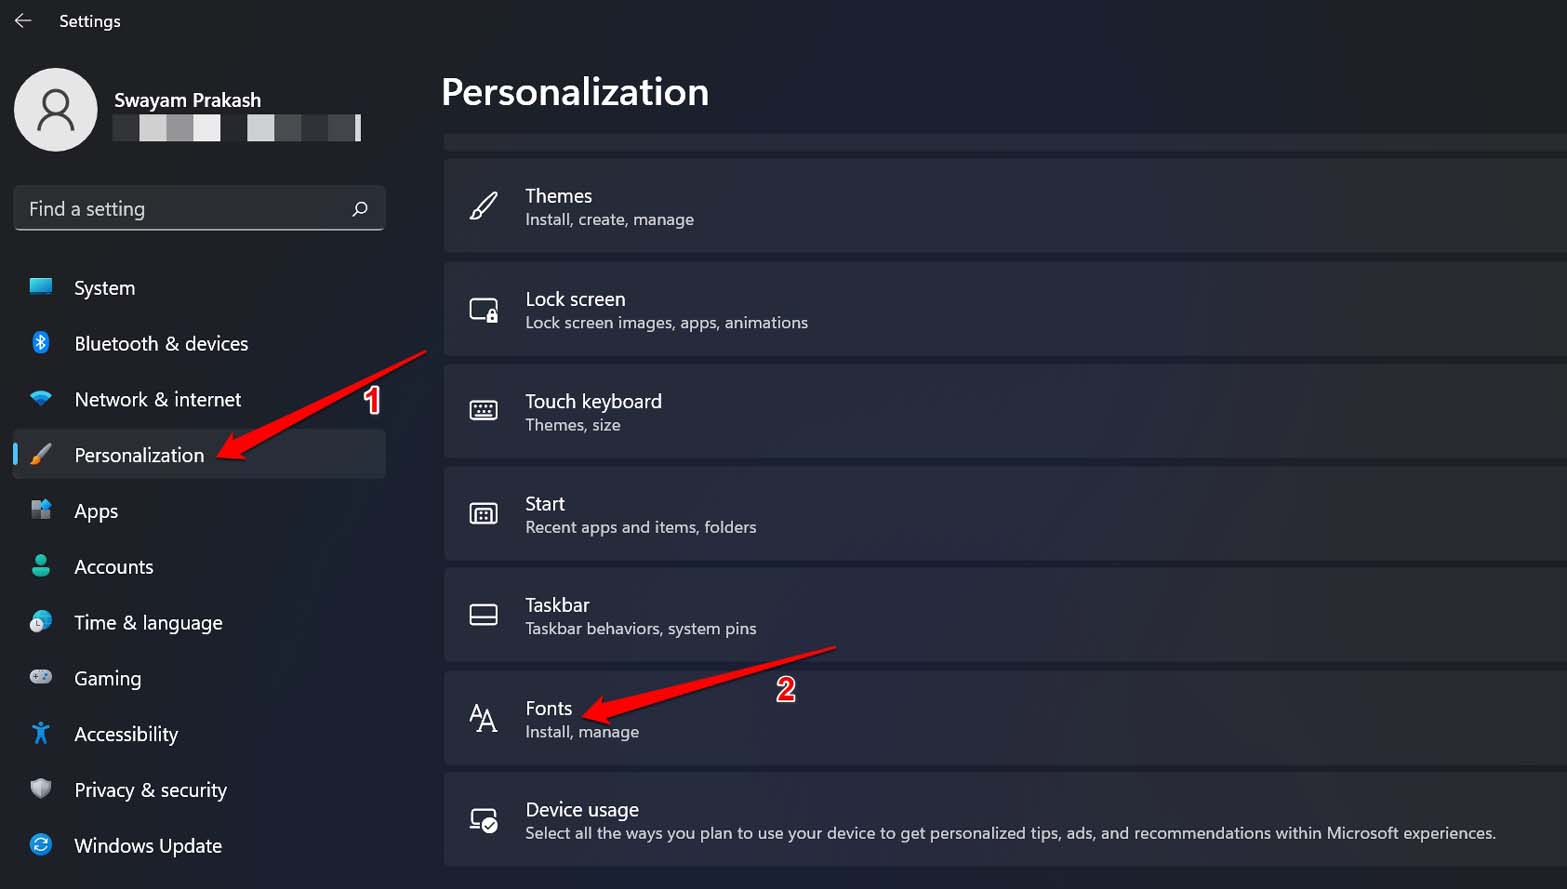
First, you have to select from any available font on your Windows PC by accessing the settings.
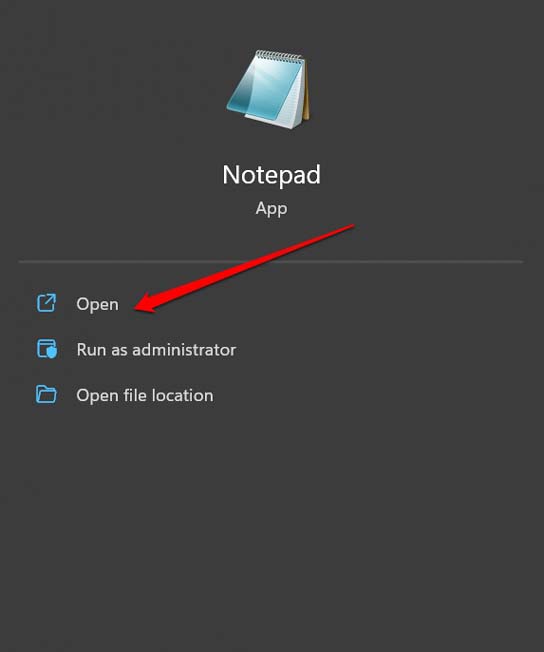
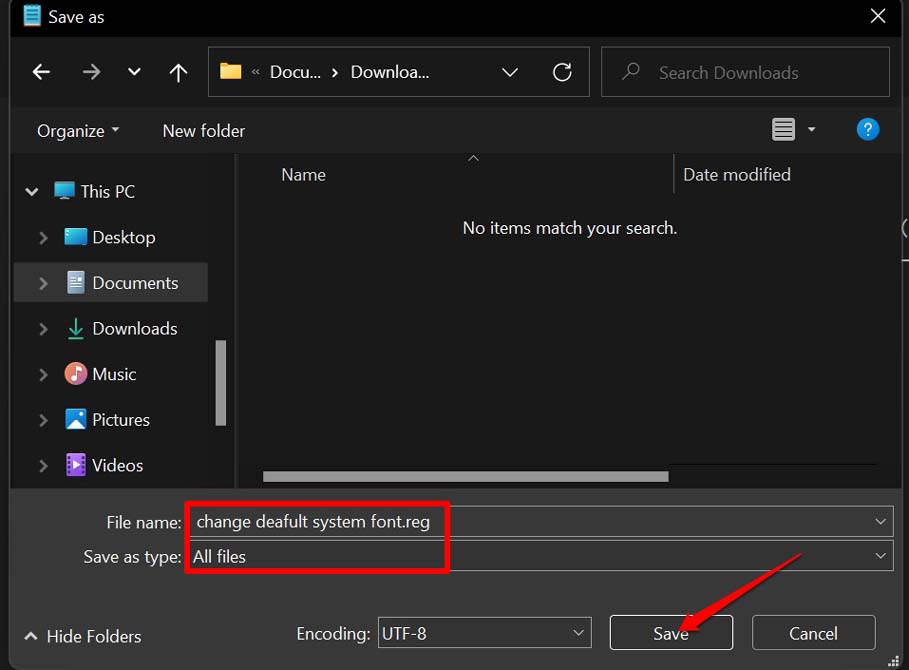
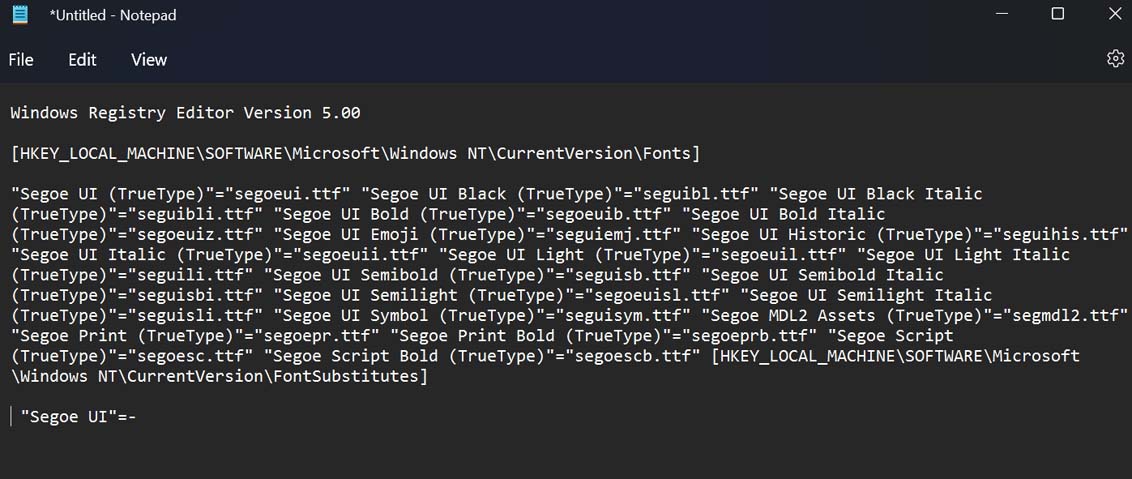
Creating a Registry File for the Selected Font
That’s it. You have successfully changed the default system font on Windows 11.
Restore Default System Font on Windows 11
If you want to go back to the default system font on your Windows 11 PC, then here are the steps for that. This process is the same as the previous where you have to create a new registry file and execute it. Note that, in the above two methods, when you create a new registry file, you are modifying the existing registry of Windows. Carefully, copy the code fragments and make sure not to alter them in any way. Doing so may cause Windows OS to behave erratically. As the methods involve tweaking the registry, do so at your risk.
How to Change the Font Size on Windows 11?
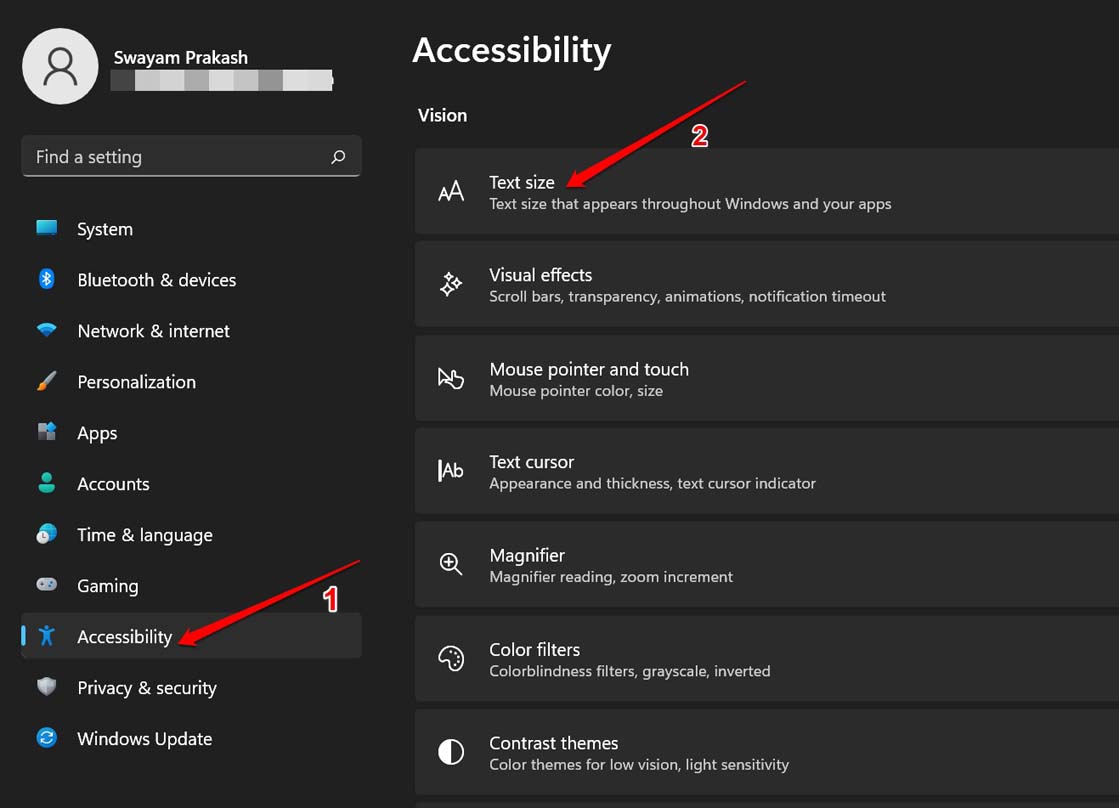
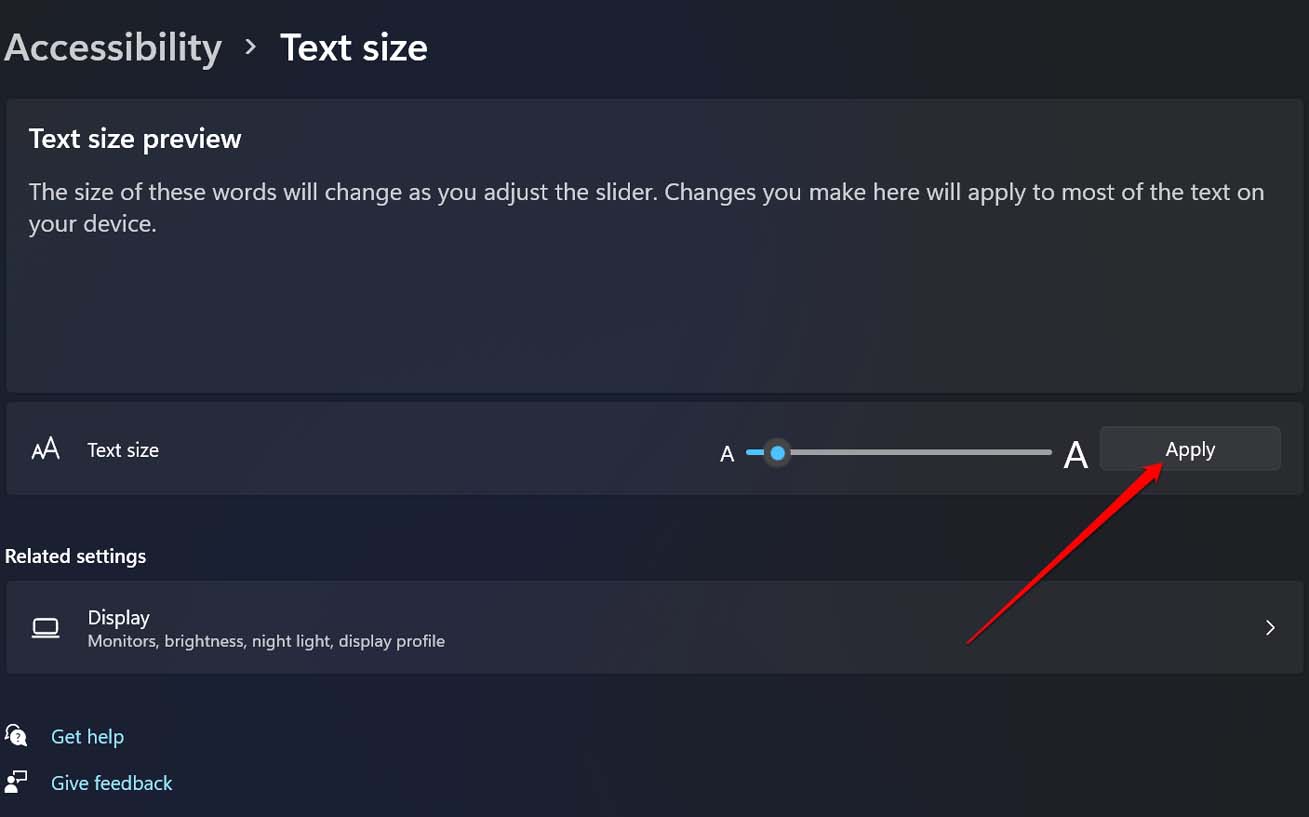
After setting your choice of default system theme font, you may also want to change its size. Here is how you can go about it. This doesn’t require creating any registry files. The change to the font size will reflect immediately on the system font.
Conclusion
If you are one of those enthusiasts who love tweaking fonts and themes on their devices, try this out. The process for changing the default system font on Windows 11 is quite simple. Personalizing Windows OS is always so much fun. If you’ve any thoughts on How to Change Default System Font on Windows 11?, then feel free to drop in below comment box. Also, please subscribe to our DigitBin YouTube channel for videos tutorials. Cheers!
